top of page
Writer's pictureMission Food

Showing you exactly how to cook bacon in the oven with step-by-step photos. This is the EASIEST way to cook perfectly crisp and perfectly straight bacon!

Every so often, you stumble upon a cooking trick that blows your mind and makes you wonder why you ever did things differently. Like these baked eggs, baked bacon is doing just that!


Baking bacon in the oven is the easiest way to cook it. You end up with evenly cooked bacon that is also perfectly straight, which is perfect for sandwiches or freezer breakfast sandwiches.

Not only that but it's so much more hands off. Pop it in the oven and you have your hands (and your stove top) free for other things. You just need to keep an eye on it during the last few minutes of cooking, and voila! Perfect bacon, every time.


Reasons you'll ♡ this technique

  • it cooks evenly and ends up perfectly straight

  • your hands and stove top are free to prep other things

  • you can cook a big batch

  • it's just so easy

Step by step directions


1. Pre-heat- turn the oven to 400°F.

💡 TIP- It's important that your oven is fully pre-heated and accurate in temperature, otherwise your bacon might stick to the pan.


2. Prepare baking sheet- line a rimmed baking sheet with foil (or don't use foil- it's fine without!). Arrange bacon in a single layer with little to no overlap. If you want to cook a full package, use two sheet pans!

💡 TIP- If using foil, you can fold the side up to contain the bacon grease and make clean up easy!


3. Bake- once the oven is up to temperature, place the pan in the oven. Bake for 15-20 minutes. Bacon can go from perfect to over-done quickly, so start really paying attention at 15 minutes!

💡 TIP- If you have two sheet pans, rotate them halfway through.


4. Drain- Transfer baked bacon to a paper towel-lined plate and allow excess grease to drain off.


FAQ


Should I place the bacon on a wire rack? In my testing, I found that bacon cooked on a wire rack was less crispy, and required more effort to clean up. Allowing the bacon to simmer in the grease seems to help it infuse with more flavor and makes it more crispy. At what temperature should bacon be cooked?I recommend using 400°F, and an oven thermometer to help confirm you have an accurate temperature. I've experimented with different temperatures and have found higher temperatures (425°F) to cook less evenly, and lower temperatures (375°F) to cause the bacon to stick to the pan. Are you supposed to flip bacon in the oven?No, you don't need to flip it. The bacon cooks through evenly without. If you have two sheet pans in the oven, I do recommend rotating them. Can I skip the foil?Yes, you can skip the foil! I regularly cook bacon directly in the sheet pan to avoid the waste of foil. To clean the pan, use a paper towel to remove excess grease, then soak in very soapy water before using a bristle brush to scrub clean. Does the bacon splatter all over the oven?Surprisingly no! I definitely thought baking bacon would make a huge mess in the oven the first time I cooked it that way, and was so pleasantly surprised that it didn't.


Course: Breakfast Cuisine: American

Diet: Diabetic Calories: 230kcal

Author: Twit Tutul


Showing you exactly how to cook bacon in the oven with step by step photos. This is the EASIEST way to cook perfectly crisp and perfectly straight bacon!


Prep Time5 mins Cook Time20 mins Total Time25 mins


Ingredients

  • 1 package bacon (16-20 slices)


Instructions

  • Heat oven to 400°F.

  • Prepare baking sheet- line a rimmed baking sheet with foil (or don’t use foil- it’s fine without!). Arrange bacon in a single layer with little to no overlap. If you want to cook a full package, use two sheet pans. If using foil, you can fold the side up to contain the bacon grease and make clean up easy!

Bake- once the oven is up to temperature, place the pan in the oven. Bake for 15-20 minutes (mine takes 17 min). Bacon can go from perfect to over-done quickly, so start really paying attention at 15 minutes!


If you have two sheet pans, rotate them halfway through.


Drain- Transfer bacon to a paper towel-lined plate and allow excess grease to drain off.


Notes

To avoid foil I regularly cook bacon directly in the sheet pan to avoid foil. To clean the pan, use a paper towel to remove excess grease, then soak in very soapy water before using a bristle brush to scrub clean. Storage Cooked bacon may be stored in an air tight container in the fridge for up to 1 week or frozen for up to 3 months.


Nutrition

Serving: 2slices bacon | Calories: 230kcal | Carbohydrates: 0g | Protein: 6g | Fat: 21g | Saturated Fat: 7g | Cholesterol: 36mg | Sodium: 365mg | Potassium: 109mg | Sugar: 0g | Vitamin A: 20IU | Calcium: 3mg | Iron: 0.2mg

2 views0 comments

Thai chicken lunch bowls have roasted vegetables and chicken served over rice with a tangy home made peanut sauce. Easy to prep and keeps well for four days!


If your mornings are anything similar to mine, it is a rush to get out the door most weekdays. And busy days are exactly when you need a quick grab-and-go lunch, like these Honey Sesame Chicken Lunch Bowls or Chicken Fajita Lunch Bowls. Another tasty and satisfying meal prep recipe are these Thai Chicken Lunch Bowls.


If you like peanut sauce, you are going to LOVE this recipe!

Made by hundreds Lunch Prep Challenge participants, this was one of our most popular recipes in the challenge because it was easy to prepare and packed full of flavor.


Reasons you'll ♡ this recipe

  • easy to meal prep and flexible for ingredient swaps

  • can be adapted to your diet with low carb, gluten-free and even nut-free swaps available

  • healthy, filling, and so much better than buying lunch

Let's talk ingredients!

These lunch bowls are excellent for making with whatever fresh vegetables are available; I used broccoli and carrots, but think the chicken and peanut sauce would also be great with cauliflower, sweet potatoes, and/or bell peppers.

To change things up a bit from just using plain white rice, for this recipe I used brown basmati rice with some salt and chicken stock to add a touch more flavor to the rice.

  • rice - use your favorite rice: brown or white basmati are great choices. I also love serving this over quinoa or even cauliflower rice

  • chicken - I've used boneless skinless chicken breasts, but you could swap for boneless skinless chicken thighs. Try chickpeas to make a vegan lunch bowl.

  • vegetables - broccoli is pictured, but feel free to swap with what you have on hand: carrots, cauliflower, sweet potatoes, and/or bell peppers all sound good to me!

  • peanut sauce: creamy peanut butter, rice vinegar, brown sugar, sesame oil, and lime juice come together for a tangy, slightly sweet and savory sauce that is just perfect for drizzling over the chicken + vegetables


Meal prep tips

This recipe works great for meal prep! Here are some tips to get the most our of your prep:

  • multitask - get the brown rice cooking on the stove first, and then work on baking the chicken and veggies. While everything is cooking, make the peanut sauce.

  • containers- I recommend using condiment containers if you have them for keeping the peanut sauce separate from the other ingredients until you're ready to enjoy

  • storage - these can be kept in the fridge for up to 4 days; if freezing, you'll definitely want to keep the peanut sauce separate

Try these ingredient swaps:

  • vegan - use chickpeas instead of chicken, and vegetable broth as a substitute for chicken broth

  • extra protein - cook with quinoa instead of rice

  • low carb - try cauliflower rice as a swap for rice, use monk fruit sweetener in place of maple syrup (try 1/4 of the volume, and increase to taste)

  • nut-free - swap the peanut butter for tahini or make this maple tahini dressing

Course: Lunch Cuisine: Thai

Calories: 495kcal Author: Twit Tutul


Thai chicken lunch bowls have roasted vegetables and chicken served over rice with a tangy home made peanut sauce. Easy to prep and keeps well for four days!


Prep Time15 mins Cook Time25 mins Total Time30 mins


Ingredients

3/4 cup uncooked rice

Chicken

2 chicken breasts 12-16 oz total

1 tablespoon olive oil

1 tablespoon soy sauce

Vegetables

6 cups vegetables cut into bite-sized pieces I used broccoli and carrots

1 tablespoon olive oil

Peanut Lime Sauce

1/4 cup all natural peanut butter

1.5 tablespoons seasoned rice vinegar

1 tablespoon maple syrup (honey or brown sugar may be subbed)

1 teaspoon sesame oil

1/2 tablespoon lime juice

1 teaspoon ground ginger

2 tablespoons of water (or more as needed to thin it out)

Additional:

1/4 cup peanuts (optional- 1 tablespoon per bowl)


Instructions

  • Cook rice according to package directions. Set aside to cool slightly before dividing between four meal prep containers.

  • Pre-heat oven to 425°F.

  • Place the chicken in a small baking pan and drizzle in olive oil and soy sauce. Turn to coat.

  • Toss the vegetables in olive oil and arrange on a large baking sheet.

  • Place chicken and vegetables in the oven together. Bake the chicken for 25 minutes total or until an internal temperature of 165°F is reached, turning once halfway through the cook time. Bake the vegetables for 15-20 minutes, until softened and cooked through.

  • While chicken + veggies are baking, shake together peanut sauce ingredients. Portion out into condiment containers if you have them (if not you can drizzle over everything)

  • Divide chicken + veggies between the meal prep containers, and place a serving of peanut sauce on or with the container.

Storage

  • Store in the fridge for up to 4 days. Reheat until steaming hot, drizzle with peanut sauce and enjoy.


Notes Reheat in the microwave and then sprinkle with peanuts just before serving. These bowls will keep in the fridge for 3-4 days.


Nutrition

Serving: 1bowl | Calories: 495kcal | Carbohydrates: 49g | Protein: 36g | Fat: 19g | Saturated Fat: 3g | Cholesterol: 70mg | Sodium: 596mg | Fiber: 6g | Sugar: 10g


3 views0 comments

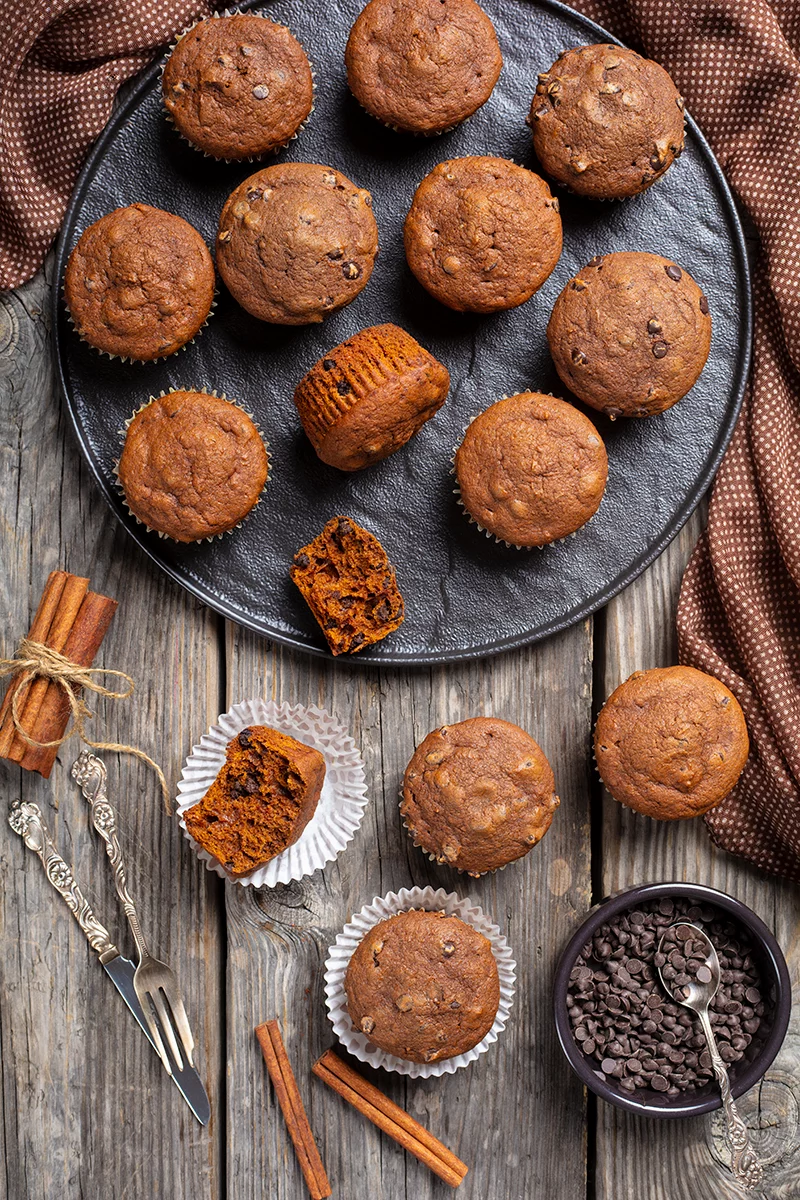
Pumpkin is good any time of the year, not just fall when everyone goes crazy over it! These chocolate pumpkin muffins have double the chocolate, which means double the decadence!

Remember my double chocolate pumpkin cookies that you all drooled and ooh-ed and aah-ed over?

This is the muffin version. I can barely call these a muffin, actually, the pumpkin makes them so moist that they are verging on a cupcake. Just look at those chocolate chips studding that gorgeous velvety chocolate interior.


Sweet and Decadent


These pumpkin muffins are seriously sinfully decadent, which is why I have a hard time actually calling them muffins. I also have my Pumpkin Chocolate Chip Muffins that are healthier muffins and to be honest, the two are night and day.


Maybe I should call these cupcakes instead?


I think you are just going to have to taste test them yourselves and then you can tell me whether they are a muffin or a cupcake. I know it’s hard, and a lot to ask of you, to bake up these beauties and take one for the team.


However, if you are brave and you do bake these up, let me know.

Cupcake or muffin?


Happy Baking everyone!

Love,

Twit


  • Prep Time5minutes

  • Cook Time20minutes

  • Total Time25minutes

  • CourseBreakfast

  • CuisineMuffins

  • Servings12

  • Calories326

Ingredients


  • 1/2 cup butter

  • 1 cup white sugar

  • 2 eggs

  • 1 teaspoon vanilla

  • 1 cup pumpkin puree

  • 1 1/2 cups flour

  • 1 teaspoon baking soda

  • 1 teaspoon baking powder

  • 1 teaspoon cinnamon

  • 1/2 teaspoon salt

  • 1/4 cup unsweetened cocoa powder

  • 1 cup mini semi-sweet chocolate chips

Instructions


  1. Preheat oven to 350 degrees.

  2. Cream the butter and sugar together until light and fluffy.

  3. Add in the eggs, one at a time, beating thoroughly after each addition.

  4. Add in the pumpkin and vanilla; beat all ingredients until light and airy.

  5. Whisk together all dry ingredients in a separate bowl, excepting chocolate chips until incorporated completely.

  6. Slowly, little by little, add the dry ingredients to the wet and mix thoroughly.

  7. Add in the chocolate chips and mix until they are spread evenly through the batter.

  8. Fill lined muffin tins to 2/3's full.

  9. Bake at 350 degree for 17-20 minutes, until the muffin tops spring back to the touch or a tester inserted comes out clean. Cool on racks.

Recipe Notes

You can try this with white chocolate chips or dark chocolate.


Nutrition Information

Serving: 12g, Calories: 326kcal, Carbohydrates: 42g, Protein: 4g, Fat: 16g, Saturated Fat: 9g, Cholesterol: 48mg, Sodium: 283mg, Potassium: 250mg, Fiber: 3g, Sugar: 24g, Vitamin A: 3465IU, Vitamin C: 0.8mg, Calcium: 49mg, Iron: 2.7mg


2 views0 comments
bottom of page